I have totally embraced the burlap trend in our home. I love it! I'm always looking for new places to add a little burlap :). I was at a wedding last weekend, and there was burlap everywhere! I was part of the clean-up crew, so of course I asked what they were going to do with all the burlap and they were going to throw it away!!! So.... I came home with A LOT of burlap. I'm glad I packed light on my way to the wedding so I had lots of room in my suitcase for some additional burlap :). Here are some of the places I've incorporated a little bit (or a lot) of burlap:
Monday, February 7, 2011
Friday, February 4, 2011
Crafts can be dangerous.
As many of you know, 2 weeks ago, I stapled my finger. Yep, I'm that awesome. I have been asked "how in the world did you do that?" a million times. So here is the story, and the craft I was making that cost me a hospital stay and surgery.
I had just worked out for the first time in centuries and I came home from this super motivated. I decided to try to work on one of the projects I had been thinking about doing for a while now. I bought this old frame from the antique store in Spring Hill for $12, and I wanted to staple some burlap to the back of it. So I was thinking that it would only take a few minutes and then I would jump in the shower and get ready for the day..... that's not how it went. I took the power stapler and placed it on the wood and I put my left hand under part of it, and then I pressed down really hard on the stapler (to make sure it went into the wood). Well, I accidentally (obviously) had the stapler turned around, and so when I pressed down on the stapler with all my strength it went into my hand that was underneath it instead of the wood.... into my left ring finger to be exact. I didn't feel it at first. I looked at the wood and saw that there was not a staple in it. I felt a weird sensation in my finger and I was afraid to look, but I had to. Sure enough, there was the staple, stuck in my finger. I tried to move it. It wouldn't move. Brian wasn't home. I called him. He said he would be home in 10 minutes and he would pull it out when he got home. I couldn't wait that long! By this point it was starting to hurt... A LOT. I walked to the neighbors house, and thank the Lord they were home! I have met them a couple of times, but I am not sure they knew who I was at first. I introduced myself and then showed them my finger :/. The husband told me to get in his car, and he drove me to some clinic in Spring Hill. Brian met me there. They sent me directly to the ER. So Brian drove me to the ER, where we waited for almost 2 hours with a staple in my finger. It was not fun, and the pain was increasing and my finger was turning weird colors (sorry if this is grossing you out). I had xrays taken of my finger, and then the Orthopedic surgeon came in my room.... I knew that meant nothing good. He informed me that I was going to have to have surgery that night AND spend the night in the hospital to get IV antibiotics! What in the world..... who knew a staple injury could be so complicated?? The surgeon said that I stapled my finger in the most perfect way. I put the staple right smack dab in the middle of the joint. Good to know I have so much skill with a staple gun. I'm fine now, the stitches are out, and I'm working on getting movement back in my finger. I would like to say I'm thankful it wasn't worse than it was, but I'm not quite sure if it could have been any worse at this point :).


At least it's a good story and I'm sure I'll be telling it for years to come. Thanks for all the prayers and support during this whole ordeal. Thankful for all of you, and yes I will continue doing crafts. Here is the project I was working on when the injury occurred and the finished project. I had to conquer my fear, so I finished the project with the staple gun, and this time the staples went into the correct place.
Here is the infamous craft:


I needed a clock in our living room, but I am not crazy about the look of really large clocks, so I bought this small one and framed it so it didn't get lost on the wall. I'm happy with how it turned out, I just wish the process could have been a little less painful :).
I had just worked out for the first time in centuries and I came home from this super motivated. I decided to try to work on one of the projects I had been thinking about doing for a while now. I bought this old frame from the antique store in Spring Hill for $12, and I wanted to staple some burlap to the back of it. So I was thinking that it would only take a few minutes and then I would jump in the shower and get ready for the day..... that's not how it went. I took the power stapler and placed it on the wood and I put my left hand under part of it, and then I pressed down really hard on the stapler (to make sure it went into the wood). Well, I accidentally (obviously) had the stapler turned around, and so when I pressed down on the stapler with all my strength it went into my hand that was underneath it instead of the wood.... into my left ring finger to be exact. I didn't feel it at first. I looked at the wood and saw that there was not a staple in it. I felt a weird sensation in my finger and I was afraid to look, but I had to. Sure enough, there was the staple, stuck in my finger. I tried to move it. It wouldn't move. Brian wasn't home. I called him. He said he would be home in 10 minutes and he would pull it out when he got home. I couldn't wait that long! By this point it was starting to hurt... A LOT. I walked to the neighbors house, and thank the Lord they were home! I have met them a couple of times, but I am not sure they knew who I was at first. I introduced myself and then showed them my finger :/. The husband told me to get in his car, and he drove me to some clinic in Spring Hill. Brian met me there. They sent me directly to the ER. So Brian drove me to the ER, where we waited for almost 2 hours with a staple in my finger. It was not fun, and the pain was increasing and my finger was turning weird colors (sorry if this is grossing you out). I had xrays taken of my finger, and then the Orthopedic surgeon came in my room.... I knew that meant nothing good. He informed me that I was going to have to have surgery that night AND spend the night in the hospital to get IV antibiotics! What in the world..... who knew a staple injury could be so complicated?? The surgeon said that I stapled my finger in the most perfect way. I put the staple right smack dab in the middle of the joint. Good to know I have so much skill with a staple gun. I'm fine now, the stitches are out, and I'm working on getting movement back in my finger. I would like to say I'm thankful it wasn't worse than it was, but I'm not quite sure if it could have been any worse at this point :).


At least it's a good story and I'm sure I'll be telling it for years to come. Thanks for all the prayers and support during this whole ordeal. Thankful for all of you, and yes I will continue doing crafts. Here is the project I was working on when the injury occurred and the finished project. I had to conquer my fear, so I finished the project with the staple gun, and this time the staples went into the correct place.
Here is the infamous craft:
I needed a clock in our living room, but I am not crazy about the look of really large clocks, so I bought this small one and framed it so it didn't get lost on the wall. I'm happy with how it turned out, I just wish the process could have been a little less painful :).

Monday, January 24, 2011
Trying some safer options for crafting...
So as many of you know.... I had a little (big) accident with a power stapler this weekend. I'll post about that when it's easier for me to type. I only have use of my right hand at the moment, so I'm a little slow on the keyboard :).
Today I had to call out of work.... narcotics and a bulky dressing would have made my job a little difficult. I slept a large part of the day, and then I experimented with a little photo editing. I bought some huge frames from IKEA recently and I have been planning on adding some pictures from my past mission trips to them. Today I added some verses to a few. I am only going to put two of the pics up, but I'm not sure which ones to choose. The verses might be hard to read, but they are going to be 8"by10" on my wall.


Today I had to call out of work.... narcotics and a bulky dressing would have made my job a little difficult. I slept a large part of the day, and then I experimented with a little photo editing. I bought some huge frames from IKEA recently and I have been planning on adding some pictures from my past mission trips to them. Today I added some verses to a few. I am only going to put two of the pics up, but I'm not sure which ones to choose. The verses might be hard to read, but they are going to be 8"by10" on my wall.
Sunday, January 16, 2011
A little spray paint can go a long way...
Brian and I moved into a 4 bedroom house with enough furniture to maybe furnish a one bedroom home. We did not want to spend a lot of money on furniture, and we are very thankful that we did not have to. Brian's parents gave us A LOT of furniture when we moved here, and we have found some great pieces at the local antique mall and at the Nashville flea market. Except for our new couch and chair and a rug for the living room, we haven't spent more then $20 on a piece of furniture for our house. We are very thankful. I have learned when I'm at Goodwill or the antique mall that I can find a pretty ugly yet cheap piece of furniture for our house that will look like new in no time simply with a $5 can of spray paint and a little bit of sanding. I have been asked numerous times how I paint my furniture so here are some of the pieces I painted and a quick tutorial on how you can do it to.
Painting furniture can be done in these few simple steps. I am in no way a pro at this, and I'm sure there are better ways to do it, but this is what I did and I am pretty content with the results.
These are a set of end tables given to us for free by my in-laws. I spray painted them black to match our other bedroom furniture, and they are now being used as bedside tables.
Here's what I did....
1. Sand the wood with either an electric sander or you can just use sand paper and do it by hand. I think you can get a sander for around $30, but doing it by hand works fine. It's just more time consuming. Sand the wood until the finish is pretty much removed.


2. Wipe it done with a wet cloth and let the piece dry
3. Prime the wood. For these tables I used gray tinted spray primer. I picked gray because I thought the black spray paint would cover the gray better than white primer. You can brush it on as well... it's just more time consuming. Let the primer completely dry.
4. Spray paint the piece with your choice of color and finish. I used the black satin finish for these tables, but I used a flat finish for the pieces in my living room. The satin is easier to dust/clean, but I like the look of the flat finish when I am going to distress the wood (which I did not do with these tables). I usually do 2 coats of spray paint per piece, sometimes 3 depending on how well the coverage is. Let paint dry.
5. Finish with a can of clear spray paint enamel to provide some protection for the paint. You can get different finishes for this as well. I always use the same finish of enamel that I used for the spray paint, but if you want a glossy look, you can use the high gloss enamel.
This red table is part of the set that came with the end tables I painted black (all free:). For this table, I used a flat spray paint called heritage red made by Rustoleum. After the spray paint dried, I used a dark brown stain and wiped some stain across the top and on the edges and legs using an old wash cloth. You can kind of see the stain in the picture below, but it's definitely more obvious in real life :).


The ladder below I bought at an antique mall in Spring Hill. I painted this one with a brush instead of spray paint. First I painted it with white primer, and then I painted it with Benjamin Moore Jalapeno pepper. I wiped a little bit of brown stain on the edges of the ladder as well to give it a distressed look. I am currently using the ladder as a shelf in the living room.


This next table I bought from the antique mall to use as a coffee table. This table was originally a very ugly color of yellow (I don't have a before picture... sorry!). I painted this table with a flat white spay paint. After the paint dried, I sanded the edges, the legs, and over the flower detail and then wiped stain over the parts I sanded to make it look distressed.

Finally, I bought this lamp at Goodwill for $7. It was originally a light oak color and had a gold base. It was quite hideous... I wish I had a before picture so you could fully understand how ugly the lamp was. I sanded it and then brush painted it with white primer, and then painted it using Benjamin Moore Wedgewood Gray paint (also the color of my kitchen:). I also bought some small tiles from Lowes and spray painted them red to use as coasters. Pretty simple.
Are there any pieces of furniture in your house that could benefit from a little paint?

Painting furniture can be done in these few simple steps. I am in no way a pro at this, and I'm sure there are better ways to do it, but this is what I did and I am pretty content with the results.
These are a set of end tables given to us for free by my in-laws. I spray painted them black to match our other bedroom furniture, and they are now being used as bedside tables.

1. Sand the wood with either an electric sander or you can just use sand paper and do it by hand. I think you can get a sander for around $30, but doing it by hand works fine. It's just more time consuming. Sand the wood until the finish is pretty much removed.


2. Wipe it done with a wet cloth and let the piece dry
3. Prime the wood. For these tables I used gray tinted spray primer. I picked gray because I thought the black spray paint would cover the gray better than white primer. You can brush it on as well... it's just more time consuming. Let the primer completely dry.
4. Spray paint the piece with your choice of color and finish. I used the black satin finish for these tables, but I used a flat finish for the pieces in my living room. The satin is easier to dust/clean, but I like the look of the flat finish when I am going to distress the wood (which I did not do with these tables). I usually do 2 coats of spray paint per piece, sometimes 3 depending on how well the coverage is. Let paint dry.
5. Finish with a can of clear spray paint enamel to provide some protection for the paint. You can get different finishes for this as well. I always use the same finish of enamel that I used for the spray paint, but if you want a glossy look, you can use the high gloss enamel.

The ladder below I bought at an antique mall in Spring Hill. I painted this one with a brush instead of spray paint. First I painted it with white primer, and then I painted it with Benjamin Moore Jalapeno pepper. I wiped a little bit of brown stain on the edges of the ladder as well to give it a distressed look. I am currently using the ladder as a shelf in the living room.

This next table I bought from the antique mall to use as a coffee table. This table was originally a very ugly color of yellow (I don't have a before picture... sorry!). I painted this table with a flat white spay paint. After the paint dried, I sanded the edges, the legs, and over the flower detail and then wiped stain over the parts I sanded to make it look distressed.
Are there any pieces of furniture in your house that could benefit from a little paint?
Monday, January 10, 2011
IKEA.... I love you.
Brian and I made a trip to IKEA recently and found some great things for our home. IKEA is definitely at the top of my list of favorite places. Even if I'm not buying anything, it's just fun to be there and walk through the store. Also.... they have a restaurant with SUPER cheap food. Brian and I ate a pretty yummy breakfast that cost $3.08 for the two of us! That is hard to beat. I started to wonder if people go to IKEA just to eat?
Brian's parents bought me these curtains for Christmas from Ikea for our kitchen, and I love them. They are so bright and cheery.
We also bought this hanging rack and green coffee cups.
This was probably my most random purchase. I guess I lost my collandar in our move, so I bought this one at IKEA. It even has adjustable handles so you can set it over the sink. It's super handy. We also bought some IKEA glasses. These glasses are seriously indestructible. Our first 6 months of marriage, I think we broke at least 6 glasses. I bought these glasses at IKEA and we haven't broke any since.... and they are pretty inexpensive so I decided to buy a few more.

I am going to make one of our bedrooms into a craft/sewing room in the near future, and I found the perfect table at IKEA for it. We bought the legs for the table for $5 a piece, but we didn't buy the table top. I am planning on buying a piece of plywood and sanding it and painting it to make my own table soon.


I also bought this fun fabric for $1.99/yard! I am not sure what I am going to do with it yet, but I'll post some pictures when I figure it out.

As always, IKEA did not disappoint. If we ever get one in Nashville I might faint from excitement.
Brian's parents bought me these curtains for Christmas from Ikea for our kitchen, and I love them. They are so bright and cheery.
I am going to make one of our bedrooms into a craft/sewing room in the near future, and I found the perfect table at IKEA for it. We bought the legs for the table for $5 a piece, but we didn't buy the table top. I am planning on buying a piece of plywood and sanding it and painting it to make my own table soon.


I also bought this fun fabric for $1.99/yard! I am not sure what I am going to do with it yet, but I'll post some pictures when I figure it out.
As always, IKEA did not disappoint. If we ever get one in Nashville I might faint from excitement.
Wednesday, January 5, 2011
Rosy Red Buttons
My "love lives here" canvases were featured today on the Rosy Red Buttons blog! Thank you for sharing!! You can check out the blog post here.
Thank you Rosy Red Buttons for featuring my project!

Thank you Rosy Red Buttons for featuring my project!

Tuesday, January 4, 2011
totally twine
I finally started taking down my Christmas decorations, and now my mantle looks very empty :(. So I made a few things to take the Christmas stuff's place until October... I mean December :). I had some left over twine from when I made this baby:
For this craft, I made some candle holders for the mantle using glass bottles, twine, and a hot glue gun. I just wrapped the twine around the bottle starting at the top and hot gluing as I went.
It was tedious but super easy. I made a little felt flower to put on the bottom of it to give it a little flare. Here's the final product:
I also used twine to make the decorative balls in the vase a while back. Same concept.... just hot glue and wrap the twine around the styrofoam ball.
I took a piece of burlap and hot glued it around a cylinder vase as well for the mantle.
A little hot glue and some twine, and the mantle is no longer looking so empty. P.S. since I had all the items at my house... this project technically cost $0 :).

Monday, January 3, 2011
Christmas and our trip to NOVA
I didn't know what NOVA meant until I met Brian :). Do you? I'm going to let you wrestle with that for awhile (you probably all know what that is already and I'm just a little slow:). Anyways, here are some highlights from our Christmas and New Years.
I had to work Christmas Eve night, so we had to stay in the Nashville area. Brian and I had Christmas morning at our house. Brian got me these super cute Merrell boots that I love. (Please excuse the lack of make-up and unbrushed hair).
And Brian got an iPad :)

Then we went to our friend Josh's family's house for Christmas brunch. His mom is a super amazing cook... so if he ever invites you over, say yes :). It was so fun to spend Christmas morning with their family. We had Christmas dinner with the Vicary family (I forgot to take pics!). They are like family to Brian and become that way for me as well. I lived with them for a few weeks when I first moved to Nashville (before Brian moved here). We are so thankful for their family and the love they have shown us.
I worked a few days and then we headed to NOVA to have Christmas with Brian's family. It was so great to spend a few days with them.
Brian's parents bought me my very first sewing machine! Now I just need to learn how to sew....
And Brian's mom gave him this... I guess she has tried to give it to him many times but he always conveniently forgets it at home. I'll make sure that doesn't happen this time :).
There were 4 dogs in the house Thursday night! Roy was a little freaked at first, but now he feels right at home. I think he is going to be sad to leave.
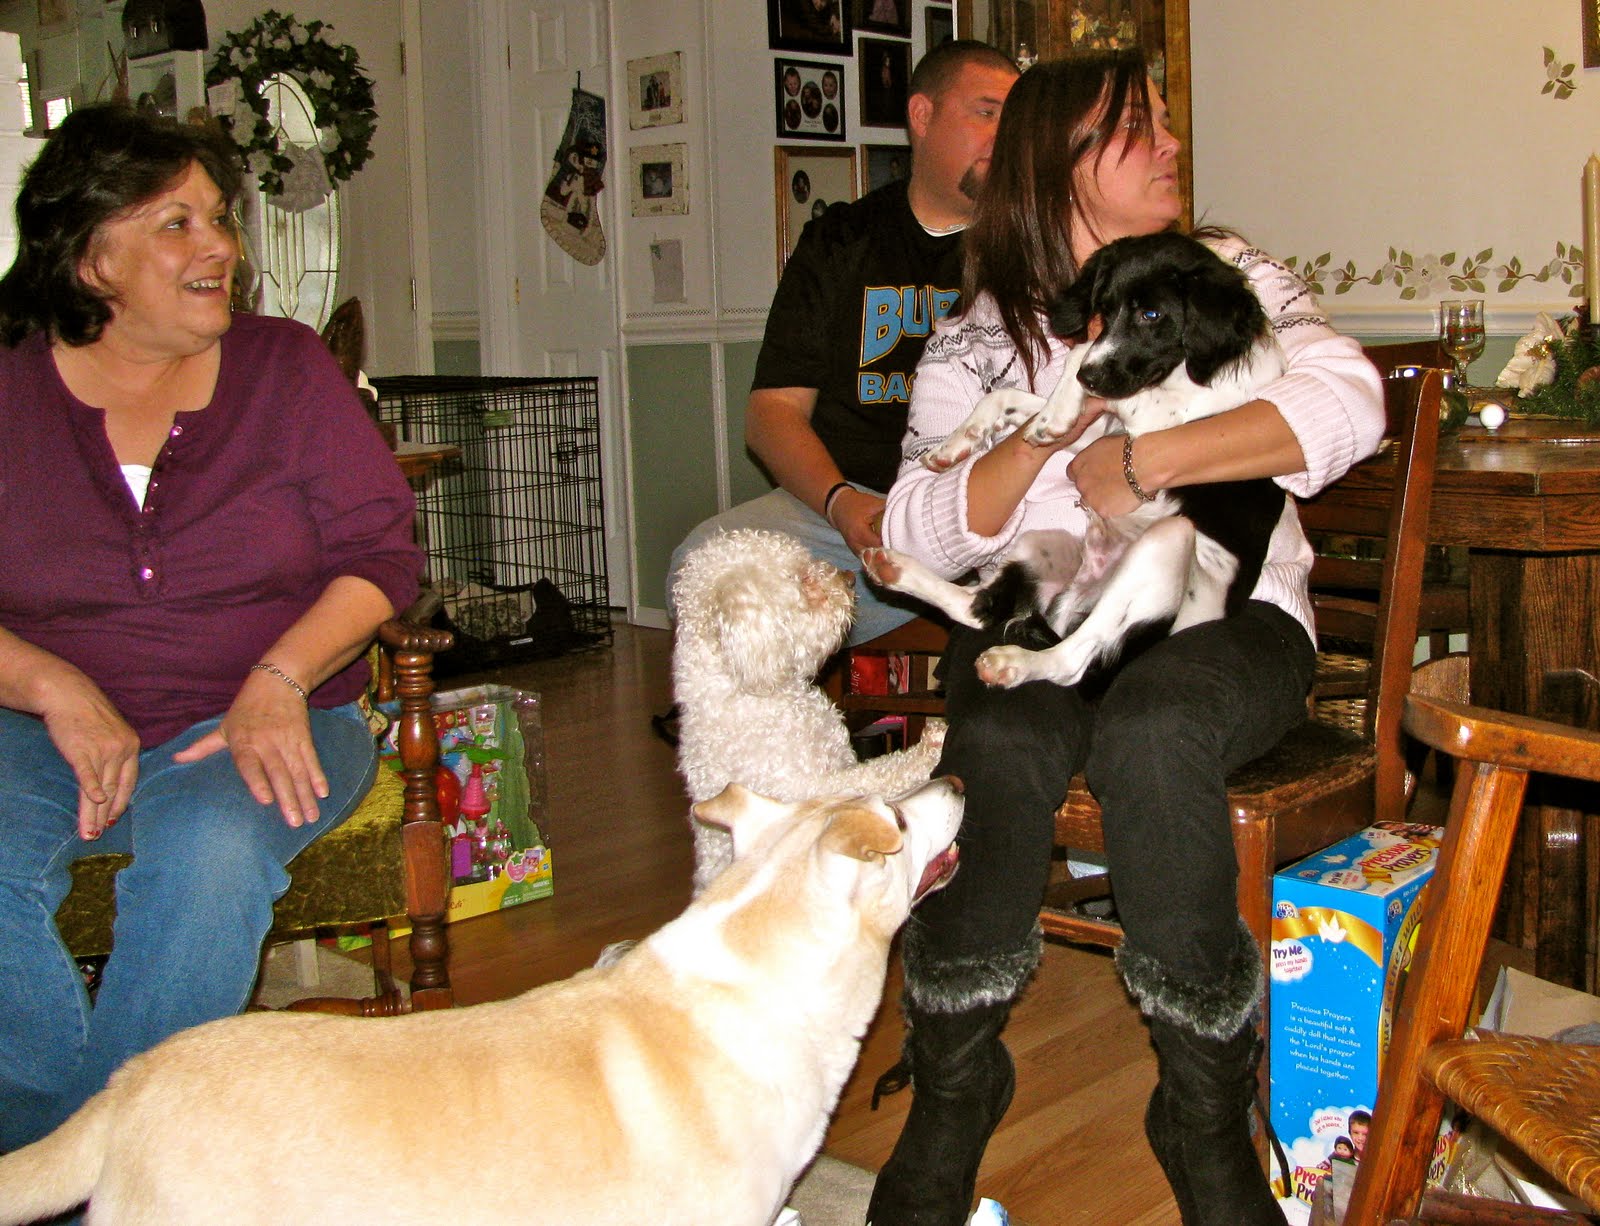
We had lots of fun spending time with these cuties.
Brian and I also made a trip to 3 of my absolute favorite stores.... IKEA (post on my IKEA finds coming soon), the J CREW OUTLET (they just opened one near his house! It was the best surprise ever), and Trader Joes (I know we have one in Nashville, but it's really far from my house and I absolutely hate Green Hills traffic). We also got to hear his dad preach on Sunday and spend lots of time just sitting on the couch watching football and movies and reading.
Finally... I had the absolute pleasure of meeting two of my best friends in Frederick, Maryland today for lunch. We had lunch in the beautiful historic district. I had no idea that Frederick has so much charm. It was so great to see these women. I am extremely blessed by their friendship.
Historic Frederick.
One of the cutest Starbucks I have been to.

Love these ladies and hoping for more lunches in Frederick in the future.

Back to Nashville tomorrow. I have some crafts I'll be working on and hope to get them on the blog soon. I hope you have enjoyed these first few days of 2011... I sure have!
I had to work Christmas Eve night, so we had to stay in the Nashville area. Brian and I had Christmas morning at our house. Brian got me these super cute Merrell boots that I love. (Please excuse the lack of make-up and unbrushed hair).
Then we went to our friend Josh's family's house for Christmas brunch. His mom is a super amazing cook... so if he ever invites you over, say yes :). It was so fun to spend Christmas morning with their family. We had Christmas dinner with the Vicary family (I forgot to take pics!). They are like family to Brian and become that way for me as well. I lived with them for a few weeks when I first moved to Nashville (before Brian moved here). We are so thankful for their family and the love they have shown us.
Brian's parents bought me my very first sewing machine! Now I just need to learn how to sew....
Finally... I had the absolute pleasure of meeting two of my best friends in Frederick, Maryland today for lunch. We had lunch in the beautiful historic district. I had no idea that Frederick has so much charm. It was so great to see these women. I am extremely blessed by their friendship.
Historic Frederick.
Love these ladies and hoping for more lunches in Frederick in the future.
Back to Nashville tomorrow. I have some crafts I'll be working on and hope to get them on the blog soon. I hope you have enjoyed these first few days of 2011... I sure have!
Subscribe to:
Posts (Atom)